future technology: root sony
Showing posts with label root sony. Show all posts

Monday, 11 April 2016

Guide to Root Android Sony Xperia M2 Single or Double Run on Kitkat 4.4.2.

Guide to Root Android Sony Xperia M2 Single or Double Run on Kitkat 4.4.2.

Root Android Sony Xperia M2. This guide will show you how to Root Android Sony Xperia M2 Single or Double Run on Kitkat 4.4.2. For some reason rooting android device will void the warranty, but if you sure in what you are doing now, you can follow this guide. Root on android Sony Xperia M2 devices can optimize these devices. This detail specification of Sony Xperia M2 Dual, Sony Xperia M2 dual is the smartphone with 4.8 Inch TFT capacitive touchscreen, 16M colors, work on Android OS, v4.3 (Jelly Bean), v4.4.4 (KitKat), planned upgrade to v5.1 (Lollipop) and supported with Quad-core 1.2 GHz Cortex-A7 Processor, Chipset Qualcomm MSM8226-0 Snapdragon 400, GPU Adreno 305. combined with 1 GB of RAM and 8 MP on Primary camera and VGA on secondary camera. This Sony Xperia M2 dual is released in 2014, April.

By rooting android Sony Xperia M2 device you can do the following task. 
  1. Install Apps Aplenty.
  2. Get The Latest OS Updates.
  3. Ditching the Skin
  4. Bloat Banishment.
  5. Speed/Battery Life Boosts
  6. Extreme Customization
  7. Get Infinite Features.
  8. Much more...

Prerequisite.

  1. To following this guide, make sure your Sony Xperia M2 single or Dual run Android KitKat 4.4.2.
  2. Unlock bootloader your device. See this guide how to unlock bootloader Xperia M2 
  3. http://guidebelajar.blogspot.com/2015/11/guide-to-unlock-bootloader-on-sony-xperia-m2.html
  4. D0wnload the latest flash tool from here.
  5. http://www.flashtool.net/downloads.php
  6. Then install on your computer.
  7. D0wnload Recovery Image. Here  
  8. https://drive.google.com/file/d/0B2I5z1mFfUpcUGY2QjlmQl9VT2s/view?usp=sharing
  9. D0wnload SUperSu.Zip Here 
  10. https://www.mediafire.com/?848r52krop82uo7
  11. D0wnload firmware Sony Xperia M2 Single/Dual. See This guide. 
  12. http://guidebelajar.blogspot.com/2015/10/guide-to-upgrade-flash-sony-xperia-M2.html

Flash Recovery Image.

  1. Run the flash tool on your computer.
  2. Power off your Sony Xperia M2 single or Dual.
  3. Enter fastboot mode.
    • Press and hold Volume Up button while connecting to the computer via USB cable.
      device connected in fastboot mode
      device connected in fastboot mode
  4. Then click the flash device icon, at the top left corner.
    flash sony xperia m2
    flash Sony Xperia m2 
  5. Then select fastboot mode.
    fastboot mode
    fastboot mode
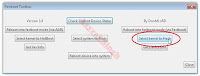
  6. Now, select kernel to flash.
    select kernel to flash
    select kernel to flash
  7. Now open Recovery image, navigate to the folder where you save recovery.img, and click Open.
  8. Make sure you see the OKAY writing on flash tool.
    okay - flash tool sony xperia
    okay - flash tool Sony Xperia
  9. Then, disconnect your Sony Xperia M2 single or Dual from the computer.
  10. Don't turn on this device.

Flash SuperSU.

  1. Turn On your Sony Xperia M2 single or Dual.
  2. When this device vibrates, release the power button, then press Volume Down repeatedly until you enter CWM mode.
  3. Now select install zip -> choose zip from storage/sdcard1/ -> pilih file UPDATE-SuperSU-v1.94.zip -> Yes
  4. Now, reboot your device, go to Advance > Power Off.

Flash Kernel And Loader.

  1. Copy Sony Xperia M2 single or Dual Kitkat 4.4 firmware into C:/Flashtool/firmwares.
  2. Now, Open flash tool.
  3. Then click the flash device icon, at the top left corner.
    flash sony xperia m2
    flash Sony Xperia m2 
  4. Select Flashmode then OK
  5. On the next screen please select your firmware. In this case please select ;
    • Device: D2302
    • Version : 18.3.B.0.31
    • Branding: Sony Indonesia
      wipe ; flashtool sony xperia m2
      wipe; flashtool Sony Xperia m2
  6. Then, leave wipe Cache and wipe Data checklist.
    wipe ; flashtool sony xperia m2
    wipe ; flashtool sony xperia m2
  7. Then, give a check on the following Exclude ;
    • Bootbundle
    • Partition
    • Fota
    • Baseband.
      exclude ; flashtool sony xperia m2
      exclude ; flashtool sony Xperia m2
  8. Make sure you see filename; kernel.sin and loader.sin under content.
    root xperia m2
    root xperia m2
  9. Once everything ready, now click flash.
  10. If you see this pop-up menu shown below, Now press and hold Volume Down button, while connecting your Sony Xperia M2 single or Dual to the computer via USB cable.
  11. Wait a minute until you see flashing finished, please unplug and start your phone.
  12. Finish.

Sunday, 10 April 2016

Guide Full Root on Android Sony Xperia Z2 Smartphone

Guide Full Root on Android Sony Xperia Z2 Smartphone.

Root on Android Sony Xperia Z2. This guide will help you to Full Root on Android Sony Xperia Z2 Smartphone. If you rooting your Sony Xperia Z2, you can more optimize this device. This is detail specifications of Sony Xperia Z2, Sony Xperia Z2 is the smartphone with 5.2 Inch IPS LCD capacitive touchscreen, 16M colors, work on Android OS, v4.4.2 (KitKat), v5.0.2 (Lollipop), planned upgrade to v6.0 (Marshmallow) and supported with Quad-core 2.3 GHz Krait 400 Processor, chipset Qualcomm MSM8974AB Snapdragon 801, GPU Adreno 330. combined with 3 GB of RAM and 20,7 MP on Primary camera and 2,2 MP on secondary camera. This Sony Xperia Z2 is released in 2014, February. And special thanks to DooMLoRD for this awesome guide.
http://forum.xda-developers.com/member.php?u=2784807

This guide work for all device with a locked and unlocked bootloader. So, you don't need to unlock bootloader Sony Xperia Z2 to follow this guide. 

Guide to root Sony Xperia Z2.

  1. Make sure you have enabled USB Debugging on your Android Sony Xperia Z2 device.
    • Go to Settings ->Developer Options -> USB Debugging.
    • If Developer Options does not appear under the settings menu. You can enable it by going to :
      • Settings > About Phone > Device Info and tap on Build Number for about 7-8 times. And then go back and follow the previous step.
  2. Please enable "Unknowns Source" from (Menu -> Settings -> Applications)
  3. Make sure ADB Driver was installed correctly on your computer. you can check it at ;
    • Control Panel > Device Manager.
      adb driver installed on computer
      adb driver installed on the computer
  4. Then, connect your Sony Xperia Z2 device using a USB cable to the computer. It will automatically install the driver. (for windows 7 or above)
  5. You must d0wnload this file (Z2-Community_RootKit-v01.zip) Here 
    • https://drive.google.com/file/d/0B2I5z1mFfUpcbWU0cTF4WHBOTlE/view?usp=sharing
  6. Now, extract it completely using 7Zip /WinZip/WinRar.
  7. Then, go to the folder where its extracted and execute "RUNME.bat"
  8. Now you will see the following screen appear that say "Installing exploit app"
    Installing exploit app
    Installing exploit app
  9. And you will see on your computer screen, that this script is copying a big file size. Just let it go work.
    copying big size file - root xperia z2
    copying big size file - root xperia z2
  10. Once copying process is completed, the script will ask you to 'Crash' the service menu app to complete. Now, you can access your phone and you should notice that the script has opened your Service Menu.
    • Click on Service Info > Configuration.
  11. Your  Sony Xperia Z2 will blink and then you will be thrown back into the Service Menu.
  12. Then, Click any key on your PC/laptop to continue.
    Crash' the service menu app
    Crash' the service menu app
  13. If successful, you will then see the following screen. 
    succesfully root xperia z2
    succesfully root xperia z2
  14. Once again, the process is the same as above. 
    • Crash the Service Menu 
    • and then press any key on your PC to continue.
  15. If the second step successfully you will see a notification on your computer screen that say "Removing exploit app" which will then disappear.
    Removing exploit app
    Removing exploit app
  16. Now, Disconnect the USB cable from your Sony Xperia Z2 and reboot the device once the script window disappears.
  17. Finish, 
    root sony xperia z2
    root sony xperia z2
  18. Now your Sony Xperia Z2 is rooted.

    Guide to Half Root and Full Root Android Sony Xperia M Smartphone.

    Guide to Half Root and Full Root Android Sony Xperia M Smartphone.

    Root Sony Xperia M. On this guide we will show you how to Half Root and Full Root Android Sony Xperia M Smartphone. Rooting your device can void the warranty, but the root is needed to optimize our Android device. Some of the reasons why we must root on Sony Xperia M is this device has low internal memory capacity it's only 4 GB, and you will unable to change the default storage move to sd card on Android Jelly Bean 4.1. This detail specification of Sony Xperia M, Sony Xperia M Also known as Sony C1904, C1905, C2004, C2005; Sony Xperia M dual with dual-SIM card slots. Sony Xperia M is the smartphone with 4.0 Inch TFT capacitive touchscreen, 16M colors, work on Android OS, v4.1 (Jelly Bean)/ v4.2.2 - C2004/C2005 models, upgradable to v4.3 (Jelly Bean) and supported with Dual-core 1.0 GHz Krait Processor, Chipset Qualcomm Snapdragon S4 Plus MSM8227, GPU Adreno 305. combined with 1 GB of RAM and 5 MP on Primary camera and VGA on secondary camera. This Sony Xperia M is released in 2013, June.

    Prerequisite To Root Sony Xperia M.

    1. Sony PC Companion. D0wnload Here 
    2. http://support.sonymobile.com/gb/tools/pc-companion/
    3. Root fixer, Here 
    4. http://www.mediafire.com/download/7vpri5rmqo3b01x/rootfixer.rar
    5. Framaroot v1.6.0. Here  
    6. http://www.mediafire.com/download/ra81oebr72tmbx7/Framaroot-1.6.0.apk
    7. BusyBox Pro v9.8. Here 
    8. http://www.mediafire.com/download/s7k766h6az6xr5c/stericson.busybox.donate-155-v9.8.apk

    Root Guide (Half Root)

    1. Install Framaroot on your Sony Xperia M device.
    2. Once installation finished, Run this App.
    3. Select SuperSU,
    4. Then select Gandalf.
    5. Wait a minute, then select OK.
    6. On the next step, your Sony Xperia M device will reboot automatically.
    7. Now, Install BussyBox Pro v9.8, then run this App.
    8. If you see a question to back up, just select NO. This means to save your internal memory.
    9. Then you will see aplet loading on your screen. Just wait for this loading until 100% done.
      install busybox
      install busybox
    10. If loading stuck or not responding, just reboot manually your Sony Xperia M device and then try to run busybox again until 100% loading finish.
    11. Now select BusyBox 1.21.1 version.
    12. Then tap Install.
      BusyBox installation
      BusyBox installation
    13. Then you will see this screen. This says that your installation of BusyBox was successful.
      BusyBox was successfully.
      BusyBox was successful.
    14. Actually, on this step, you have successfully root your Sony Xperia M, but this root on half root status.
    15. Half root means you still can't make the necessary change on the file system.

    Root Guide (Half Root)

    1. Make sure you have enabled USB Debugging on your Android Sony Xperia M device.
      • Go to Settings ->Developer Options -> USB Debugging.
      • If Developer Options does not appear under the settings menu. You can enable it by going to :
        • Settings > About Phone > Device Info and tap on Build Number for about 7-8 times. And then go back and follow the previous step.
    2. Make sure ADB Driver was installed correctly on your computer. you can check it at ;
      • Control Panel > Device Manager.
        adb driver installed on computer
        adb driver installed on the computer
    3. Then, connect your Sony Xperia M device using a USB cable to the computer. It will automatically install the driver. (for windows 7 or above)
    4. Now, extract the RootFixer file.
    5. Then run SuperSU.bat and you will see a dialogue command shown on the picture below.
      run supersu.bat
      run supersu.bat
    6. Then you will see SuperSU request. select Grant.
      supersu request
      supersu request
    7. Now, follow the next step to installing the rootfix.
    8. Back to your computer screen, and press any key to start.
      pres any key- supersu
      press any key- supersu
    9. Now, just wait.
      just wait rootfix
      just wait for rootfix
    10. Once installing the rootfix finished press any key or enter key.
      root sony xperia m finish
      root sony xperia m finish
    11. If this window disappears from your screen, it's saved to disconnect your Sony Xperia M from the computer.
    12. Finish. This is the end of this guide.